|
Virtual Payment Terminal |
|
Dentisoft Technologies |

|
How to use it |
|
You will receive your Merchant ID, user name, and password from ACH Direct upon completion of the applications (credit card and/or ACH).
If you have purchased a MagTek reader, simply plug it into any USB port on your computer. The MagTek reader cannot be used for checks at this time. If you want to process a check, you will enter the check information directly into the payment screen (see below).
Step #1: Setting up your Merchant account. Remember: using the MagTek reader is optional, but produces lower credit card transaction fees.
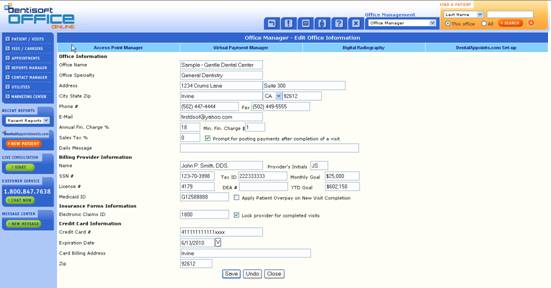
In the Office Manager module, click the tab titled Virtual Payment Manager. Enter your account info (MID , User name, password). |

|
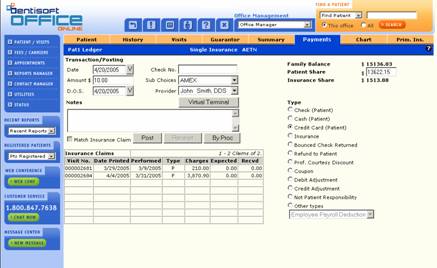
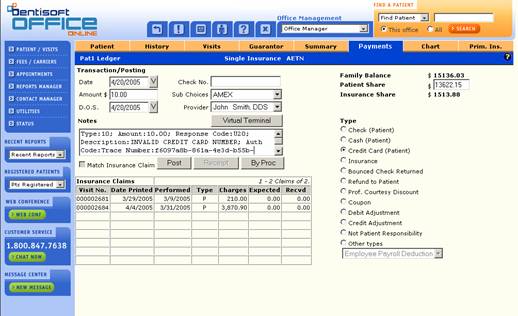
The new Virtual Terminal button will be automatically displayed in both the Payments and the Post By Proc screens. Enter an amount as you would normally. |
|
Step #2: Click the Virtual Terminal button. This will bring up the new Virtual Terminal screen. The Type of transaction options (check or credit card) appearing in the Swipe screen will depend upon whether you have chosen to process a credit card or ACH transaction. The Amount and the Type will be automatically carried over. If you did not enter the Amount, a pop-up message will ask you to enter the amount or you can click the No button to skip entering the amount. (e.g. Authorization only transaction Type) |
|
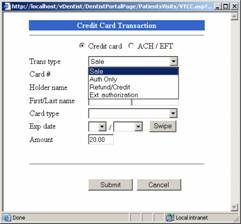
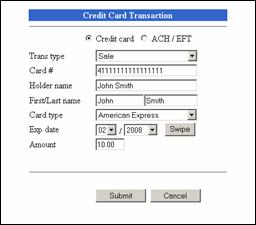
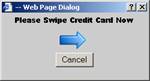
Processing a transaction: Select the Credit Card or ACH/EFT transaction type. You can either click on the Swipe button to capture the credit card information automatically, or enter the information manually. Make sure all of the information is correct before clicking the Submit button. |
|
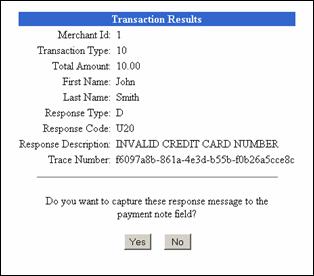
After clicking on the Submit button, the information will be submitted for payment, and the Transaction Results screen is presented. This shows the response code, description, trace, etc. You can then click on the Yes button to capture the response message to the Payments Notes field for future reference |
|
You will then be presented with a Receipt. It is recommended that the first page be signed and retained in the patient’s file. The second page can be provided to the Patient. |

|
Step #3: Please make sure you click on the “Post” button to actually post this transaction the patient’s ledger.
|
|
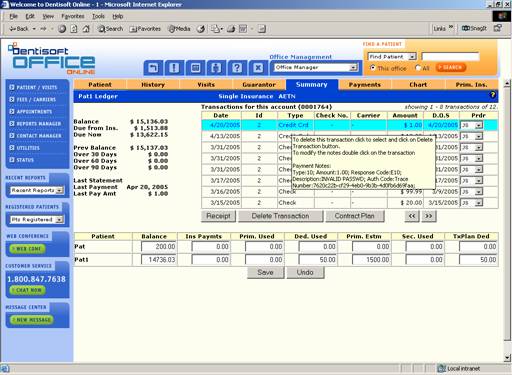
Summary Screen: Move the mouse over an individual transaction to see details |
|
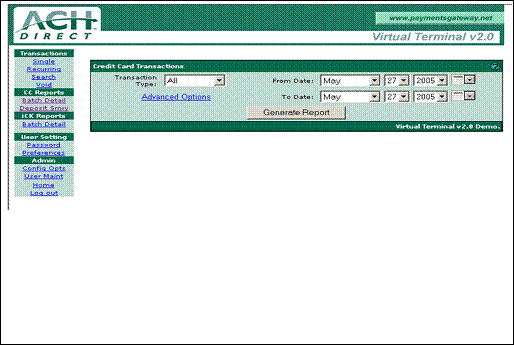
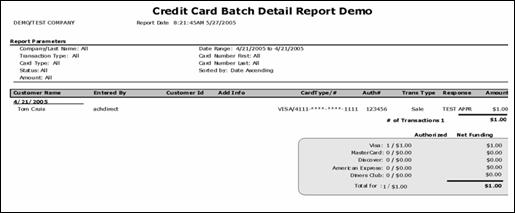
The online Payments Gateway then lets you see all your transactions in real-time. |